Showing posts with label Crafty. Show all posts

Sunday, November 23, 2008

The Bearded Ladies Present: Shop Austin! NEW APPLICATION

When we started The Bearded Ladies Present - we wanted everything to be streamlined and easily accessible through the web. Anne Marie is in Austin, TX and Allison is in San Diego, CA.

How could we possibly review applications on paper? More and more shows are going towards an electronic application - and we wanted to be part of this movement.

Well - not everything works out as planned. We thought we had the *perfect* application online, and then we started getting error reports... After much trial and error - we have now improved and *hopefully* error-proofed the application for The Bearded Ladies Present: Shop Austin.


To apply for our show, first read through all of the show details on our Apply Here Page. You can then move onto the Application, which is now broken down into a three step process.

We're looking for artisan based in Central Texas who handcraft fine objects - clothing, handbags, jewelry, kids items, home decor, pet items, gourmet food and more. The Bearded Ladies Present: Shop Austin will be THE shopping event of 2009 - be a part of our show and apply now!


If you have any questions or encounter any errors with the application, please Contact Us!


xo, Anne Marie & Allison

www.TheBeardedLadiesPresent.com


www.AnneMarieBeard.com

Friday, August 22, 2008

The Stitching Studio Grand Opening!


Have you ever wanted to learn how to sew? Make clothes for your kiddos or yourself?

How about make your own purses or jewelry? The Stitching Studio has you covered!

Come join us for a fabulous grand opening this Saturday from 1pm to 5pm. The Stitching Studio offers many levels of sewing and crafting classes, from beginner to advanced.

Anne Marie Beard
is one of the featured teachers! Did you know that she is now working on a line of patterns from her handbag designs?

Come on out and meet the teachers, shop for some handmade goodies, and get inspired by all the crafty classes you can take! We even have classes designed for you to handmake your own holiday gifts :)

xo, Anne Marie


PS: ANNE MARIE IS GOING TO BE HAVING AN END OF SUMMER CLEARANCE SALE! DON'T MISS THIS CHANCE TO GET SOME AWESOME BAGS AT UP TO 50% OFF!!!

Wednesday, August 15, 2007

DIY Wednesday: Painted Pots!

Ok friends - this is my very first attempt at writing a DIY Project blog! I have been crafting for almost all of my 28 years - and I am ready to start sharing some of my fun projects with you.

This Spring & Summer have been all about the pots and plants. I decided to start container gardening, and being the crafty gal I am - I just had to have handpainted pots! So here we go on the tutorial:

Supplies:

  • Terra Cotta Pot(s)

  • Acrylic Paints - Basic white for base coat & pretty colors for fun

  • Brushes - Sponge Brushes are easy and cheap

  • Polyurethane for sealing

  • Drop Cloth or Newspaper to protect your work surface

  • Wax paper or something to squirt out your paint on

The Process:


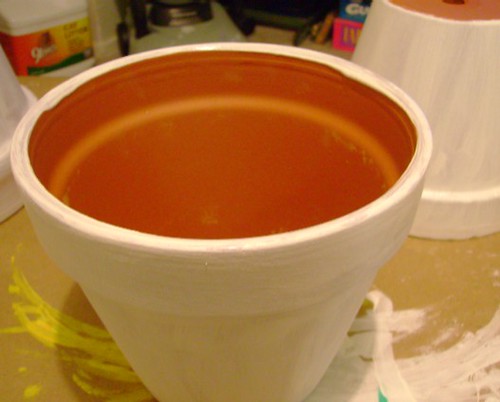
Step One: Start with a clean, dry pot - mine were all new - but it doesn't hurt to rinse them off. Paint the pot with two base coats - I used Acrylic Gesso - but you can use Spray Paint too.


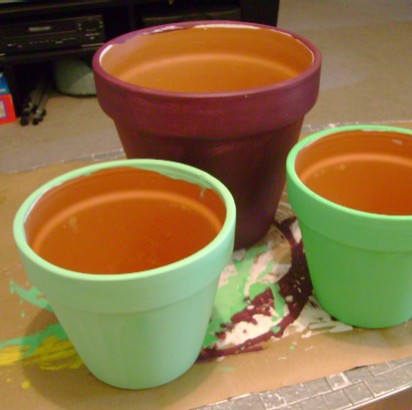
Step Two: Paint the pot a pretty color! Acrylic paints are inexpensive and readily availbe at Craft and Hobby Stores. You can judge if you need one or two coats depending on the quality of paint.


Step Three: Paint designs! I tried to keep things simple and just painted freehand. If you're a beginner, try drawing your designs on the pot with a pencil and then painting over them. A Q-Tip works great for little dots...


Optional: Try Decoupage! Such a fancy word for an easy technique - cut out shapes from Fashion Magazines and glue them on with White Glue or ModgePodge. After many months of rain - my Decoupaged pots aren't holding up as well - but they're still cute!

Step Four: After the paint is all dry - spray the pots with 2 coats of Polyurethane Spray. Do this OUTSIDE and follow the instructions on the product. It helps to coat the inside of the pot too, as terra cotta is very pourous.


Enjoy your Pots! Check out more of my crafts and additional pot pictures in my iTaggit Crafts Collection. I would love to see your crafty projects posted on iTaggit for all to see!


My iTaggit Profile


Tuesday, August 7, 2007

Treasure Tuesday: Funky Jewery Collection!

So for those of you who don't know - I collect jewelry. I started adding my extensive collection to iTaggit last week - and it was so fun!

I can remember where I bought most pieces, or who gave them to me. I like being able to write the history of each piece on iTaggit.

I wanted to feature a few of my favorite pieces today [:P]

First is this huge necklace that my friend Jasmine gave to me. I love the organic feel it has, and it makes any t-shirt immediately dressy.


Second is my "wooden delight" necklace - I scored it at a Thrift store for a few bucks, and I get SO many compliments on it.

Check out the rest of my collection here! Read more of my blogs on Jewerly, Art, Crafts and Antiques here!